Main  © 2005-2009 by Eiperle CGM

How to add a timecode burn to a timeline.

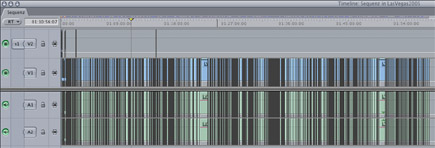
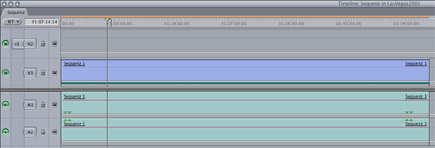
CGM DVE Vol.3+ (and CGM DVE Complete) contains a video filter which is very useful for adding a timecode burn to a movie. This workflow shows how to add the sequence timecod.

Open the timeline of your movie and select all the clips. To do this simply select the Sequence window and press Apple + a on the keyboard. Execute Sequence / Nest Item(s)... from Final Cut's pulldown menu. Final Cut asks for a new Sequence name and confirm this request with OK.


The complete movie is now nested in a new timeline which looks like one long clip. Apply the CGM Timecode/Reel video filter (located in Video Filters / CGM DVE FX) onto the new scene and open its settings. You can open them by control-clicking the new "one clip" timeline and selecting "Open in Viewer" in the context menu and finally click the Filters tab in the Viewer.

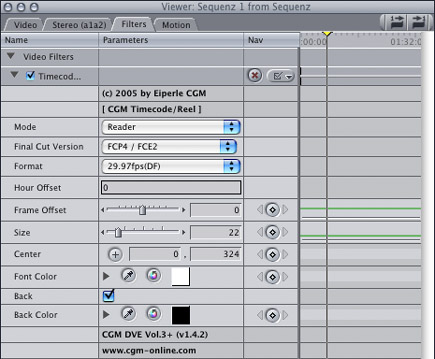
The preset timecode reader is set to 29,97 fps (DF) format. Do the changes you need and render the result if necessary.

Ready!


Mode Here you can select the timecode mode. The available modes are Generator, Reader and Generator without a label.
Final Cut Version Please select here the version of Final Cut which you are using. Final Cut Pro 5 has the same behaviour as Final Cut Pro 4.
Format Select here the video format you are using.
Hour Offset The amount of hours will be added to the real timecode.
Frame Offset The amount of frames will be added or subtracted from the real timecode.
Size This is the font size.
Center Defines the position of the timecode burn.
Font Color Choice of which font color.
Back Provides a backplate to give the timecode better visibility over the video.
Back Color Choice of which backplate color.

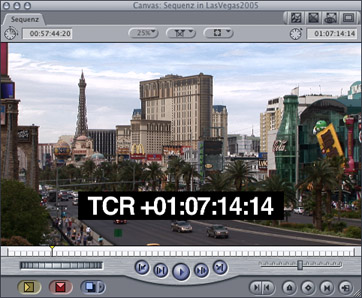
If there is a reel name defined, it will be displayed in the second line.