Scrolling title with shared background - Movie
Scrolling title with shared background - Movie
|
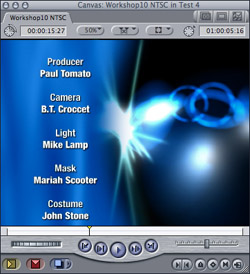
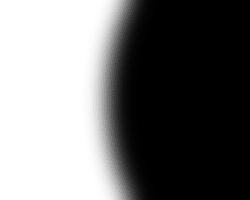
This workshop explains how to make a scrolling title with a shared background. The movie is coming to an end in the background on the right whilst the smooth keyed background behind the title on the left makes the letters much easier to read. Make a mask for transparency similar to the picture you see here (size: 720 x 480 pixels). You'll need this mask to key the background of the titles onto your movie. The black is the area that will be transparent. Save the picture as "TIFF" onto disk. Open a new picture (size: 720 x max. 3500 pixels) and type your text as described in Workshop 1. The text's alignment should be similar to the text in the example above. * You'll find all the example pictures in the Workshops folder on the CGM DVE CD. If you don`t have the CD, go to our homepage (www.cgm-online.com) into the download area and download the file Example Graphics (used in the workshops). This file contains all pictures which are used in the workshops. Save the image as a TIFF file under a new name. Our example is named 'Text Outro (NTSC).tif'. |
|
|
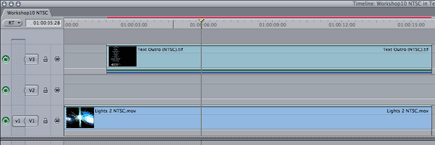
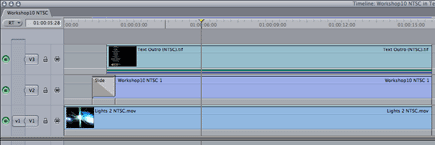
Import the title into Final Cut and drag it onto V3 of your timeline at the end of your movie, leaving the video track between clear for later use. FCP4 and FCE2 users should switch to SaveRT. Lengthen the duration of the title as desired. |
 |
| Doubleclick the
TIFF file in the timeline to open it's settings in the viewer and switch
to the motion tab. There you can see that Final Cut automatically changes
the scale and aspect ratio of oversized images.
In order to ensure optimal render quality, it's recommended to use this exact pixel size as a default setting for all images in FCP. Click onto the basic motion reset button (1) and the scale setting goes back to 100%. Then click onto the distort reset button (2) and the aspect ratio will be 0. |
 |
|
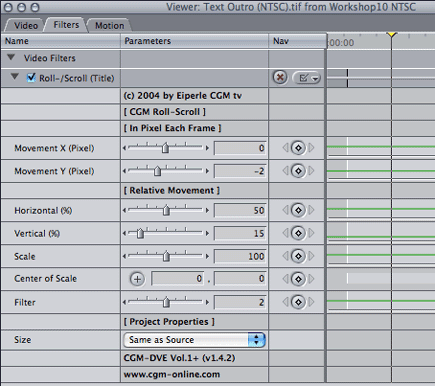
Apply the Roll-/Scroll Title video filter (located in Video Filters / CGM DVE 2D) to the text and open its viewer (double-click). Click the Viewer's tab Filters. Set the vertical start position of the title (15% in our example). Then modify the speed of the roll movement with the slider for movement y. In this example we’ve set a value of -2 pixels for the upper direction. Change the duration of the title track by trimming the end unil the text has rolled out completly. |
 |
| Open a new timeline and drag the title's background into V2. Change its duration, making it one second longer than the title. Drag the mask onto V1 and extend its duration too. Selecting the title's background, modify the composite mode using the pulldown menu: Modify / Composite Mode / Travel Matte-Luma. | 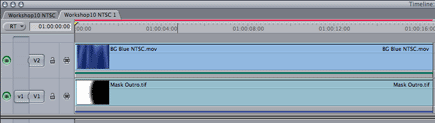 |
|
Drag the icon of the new timeline from the browser directly into the empty V2 of your movie's timeline, between the title and the movie. To move the title's background into the screen, apply the CGM Slide plug-in (located in Video Transitions / CGM DVE 2D) at the beginning of the background in V2. Select the Method In and set the Direction to Right. |
 |