|
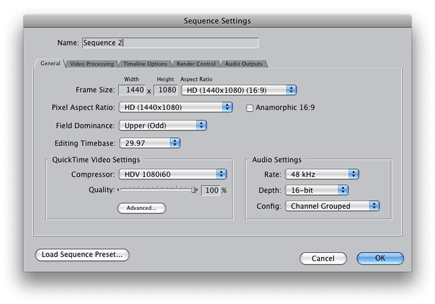
How to convert Final Cut Pro HD productions into a standard resolution DVD at the best quality? The best way is to cut the project in a HD timeline and then create a new timeline in a standard video resolution. Copy and paste all scenes from the HD into the standard video timeline and scale down using Final Cut Pro. Export the video as a self contained QuickTime video and use the Compressor to render the MPEG2 Video and DVD Studio Pro for the DVD authoring. Of course, you could scale down the video using Compressor, but the video will be unacceptably soft, so don't take this route. And now step by step: Cut your project in a HD timeline. The screenshot shows the standard setting of HDV at 1080i/60. Normally you would use the same video compression as the camera, but if you're planning to do a lot of color correction it's better to use Apple's ProRes 422 (HQ) HD codec instead of HDV, mainly because the color resolution of HDV is rather limited. |
|
|
Select the HD timeline and press Apple + a on your keyboard. Now all scenes are selected, press Apple + c to copy them into the clipboard. Then select the standard video timeline, place the playhead at the beginning and press Apple + v. All scenes are now pasted into the standard video timeline and are already scaled down. Next select the timeline in the Browser window andchoose 'File / Export / QuickTime Movie...' from the pulldown menu. I suggest you use the following export settings:
The export will need a bit of time, depending on the rendering power of your Mac and the length of your video. Start Compressor and encode your MPEG2 by using one of the presets. I suggest you leave the field dominance setting in automatic mode. For the best AC3 Audio encoding you should try my own setting which you can download here. Simply extract the zip file and drag and drop the AC3 setting from the Finder into the presets window. The original setting changes the sound level automatically which is rarely what you want. Well, that's about it.... |
  |

