|
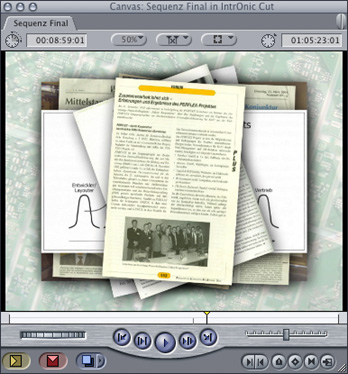
How to animate a stack of newspapers in Final Cut Pro/Express? You can't do this effect by using the built in motion tab because the ease out of the zoom and rotational movement will never be in sync. CGM DVE Vol.2+ (also included in CGM DVE Complete) includes a video filter for creating this animation very easily. Below you can see the Final Cut Pro composite of ten newspapers including their titles - don't let the screenshot put you off trying this! It's easy if you use the video generator CGM Text and video transition CGM Slide to add the titles and the animation. Here's your step by step guide. |
 |
 |
|
|
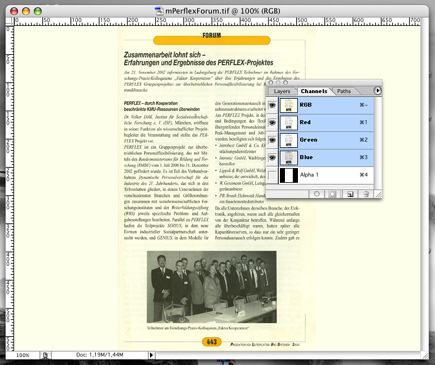
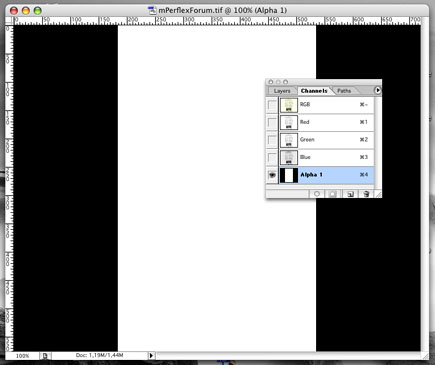
You'll get the best results when you add a straight alpha channel. Fill the whole screen with the newspaper color and cut out the edges using an alpha channel as shown in the Photoshop screenshots. Both parts are stored in one Tiff image. You can select the display of the colors and alpha channel in Adobe Photoshop's channels tab. |
 |
|
In Final Cut Pro/Express all the black areas will be transparent. |
 |
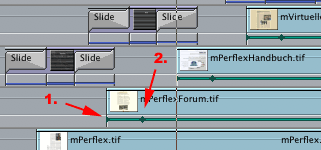
Place a newspaper scene onto a free track of the timeline at the positon where the animation should start (1). Place the video which will fill the background behind the news onto track 1. |
 |
|
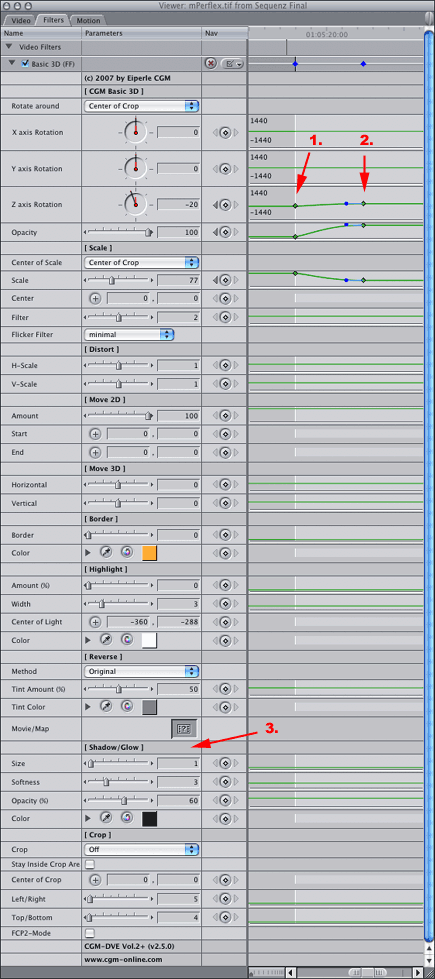
In our example video of the incoming newspapers will be scaled from 200 to 77 percent of their original size. You'll get the best results when you use Photoshop to scale and crop the newspaper to the video project's pixel size. Place the playhead at the start of the news scene (1) and set a keyframe for Z axis Rotation to -270°. This ist the amount of rotation around the z axis while the effect is running. Then set a keyframe for Opacity to 0 which will fade in the news scene. Set a keyframe for Scale to 200. That means that the news scene is scaled to 200% of its original size at the beginning of the effect. Set the playhead to the end of the effect (2) - in our example 21 frames later - and define the end values. Set keyframes for Z axis Rotation to 4°, Opacity to 100% and Scale to 77%. You'll get a nice smooth movement when you use the Bezier option for all outgoing keyframes. To do this, hold down the control key and click onto a keyframe point in the Viewer. A context menu appears where you select Smooth. The CGM Basic 3D includes a Flicker Filter & Scale Filter. For best results you can use their preset values. Does that look right yet? If you don't want the shadow to rotate with the newspaper, just add a shadow in the Shadow/Glow section (3). In the example, the shadow Size is at 1 and the Softness is at 3. That's all there is to it!
|
 |