How to animate Photoshop graphics in Final Cut Pro or Final Cut Express

How to animate Photoshop graphics in Final Cut Pro or Final Cut Express
|
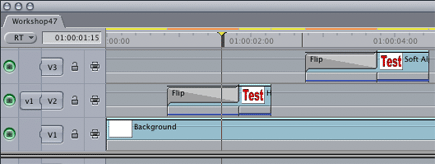
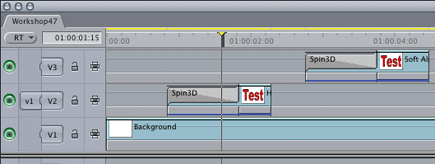
This workshop describes how to prevent the black edges on animated graphics in Final Cut Pro and Final Cut Express. First place the logo in your timeline. In our example the V1 contains the white background scene and the logo itself is placed on V2. Now let's add an incoming effect to the logo. Apply a video transition, for example Final Cut's original Spin3D (Video Transitions / 3D Simulation). * You`ll find the picture in the Workshops folder on the CGM DVE CD. If you don`t have the CD, all the pictures used in the workshops can be found in the download area of our website (www.cgm-online.com), contained in a single file "Example Graphics (used in the workshops)". Unfortunately the result is not as good as it should be as the video transition has dark edges. After researching various ways to solve this bug, all CGM video transitions now have a new function. |
|
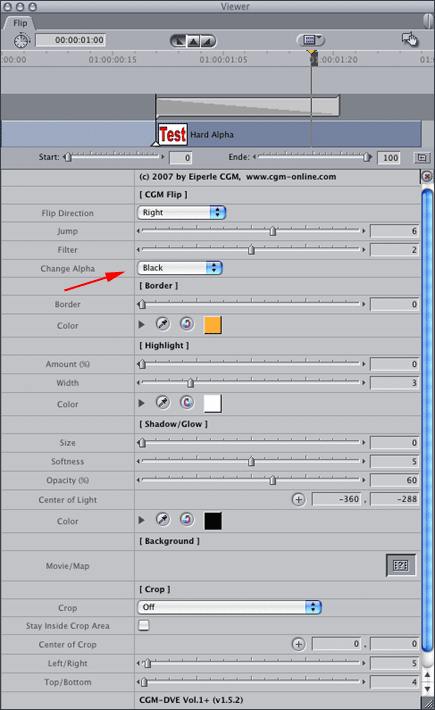
| Exchange the original effect with the CGM Flip (Video Transitions / CGM DVE 3D) and and change the 'Change Alpha' function to 'Black'. The black edges are no longer there. You may wonder why some CGM effects do not feature this new function. That's simply because this bug does not occur when using these effects. Sometimes the preview does not look the same as the rendered video. That's because Final Cut Pro and Final Cut Express cannot detect gaps while running in RT Extreme render mode, so the CGM video transitions cannot locate the gap tag, resulting in an incorrect realtime preview. |
|
|
There is one exception: the problem doesn't happen when the edges are soft. But if you want hard edges, use CGM's video transitions instead of Final Cut's own effects. Another all-in-one solution from CGM!. |
 |