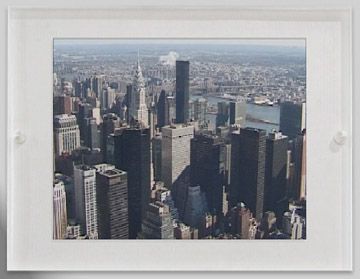
FCP and CGM Basic
3D (FF) scaling:
- Click the images to view them in full size,
see the better quality.
DVDSP / FCP's
built-in scaling
- Compare the inferior results.
Professional DVD menus and compositing
|
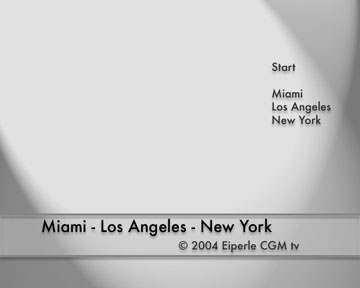
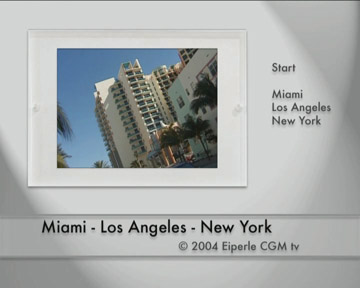
FCP and CGM Basic
3D (FF) scaling:
|
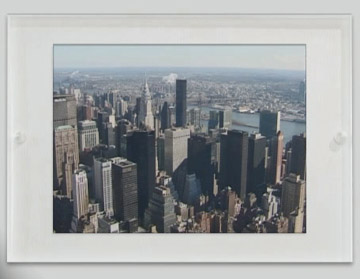
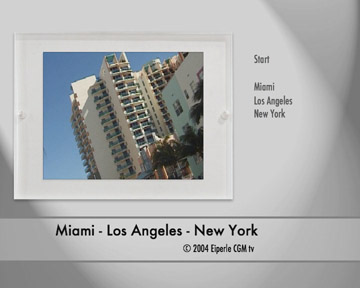
DVDSP / FCP's
built-in scaling
|
|
DVD Studio Pro lets you put scaled-down video in menus, but unfortunately the scaling quality is simply not up to professional standards (see above screenshots). But there is a workaround! The problem is that DVDSP uses the same low-quality scaling algorithm as Final Cut Pro/Express. But for more professional results, I developed a high quality scaling algorithm. All CGM plugins calculate the average of the pixels that have been removed while scaling down video. This is the important quality advantage. The solution for getting professional results is easy: use Adobe Photoshop for converting the DVDSP templates and adding the titles with their highlights. Then do the final compositing in Final Cut and export the result as an MPEG2 movie. |
|
|
 |
|
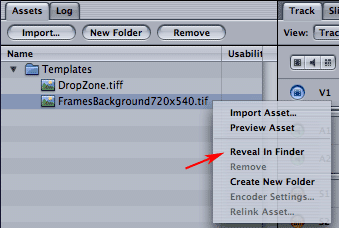
Save your template as a Photoshop file in your own documents folder on your hard disk (not into the DVDSP templates folder) and import it into Final Cut Pro/Express. |
|
|
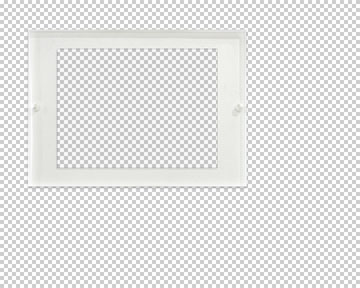
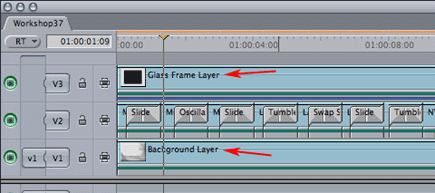
The video could be placed on track 2. When you swich off the 3rd glass frame layer temporarily, the editing and previewing will be much faster. This way I produced a 30 second overview for my motion menu. |
 |
|
Add the video filter CGM Basic 3D (FF) (located in: Video Filters / CGM DVE 3D) to your first video scene in track 2 and adjust the Scale size to the inner width of your glass frame (in the example 50%). Move the video to the upper left side into the glass frame by adjusting the sliders Horizonal and Vertical (in the example both are set to -12). If necessary, you can modify the sharpness of the scaled video by adjusting the slider Filter. The preset will be OK in most cases. Copy and paste the modified CGM Basic 3D to all videoclips in track 2. |
 |
|
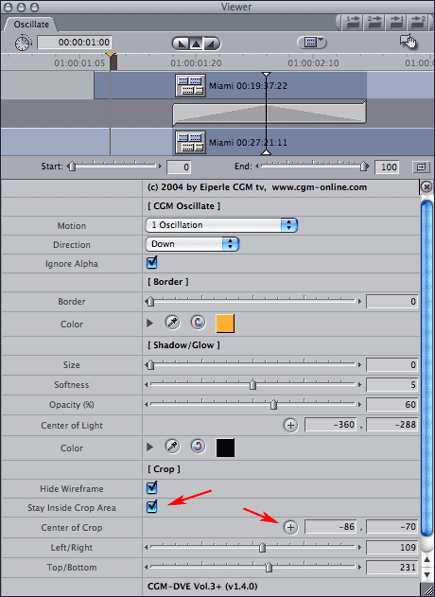
Add a CGM video transition (in the example CGM Oscillate) as a transition between two video scenes in track 2 and define the crop area in the Crop section by using the controls Center of Crop, Left/Right and Top/Bottom. Enable the function Stay Inside Crop Area. Nothing will be visible outside the crop area, better to say outside your glass frame video layer. |
 |
|
Export the whole composition as an MPEG2 movie and use this as background movie for your motion menu in DVDSP. |
|