Clone Area
Clone Area
|
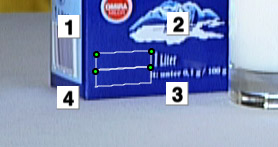
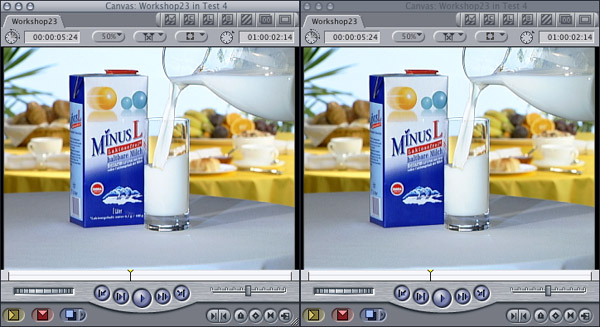
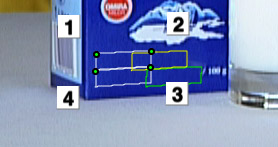
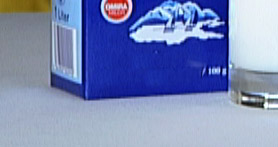
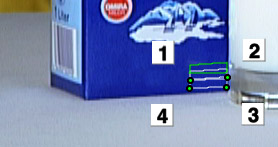
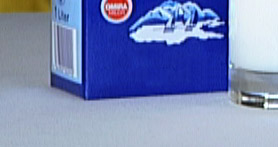
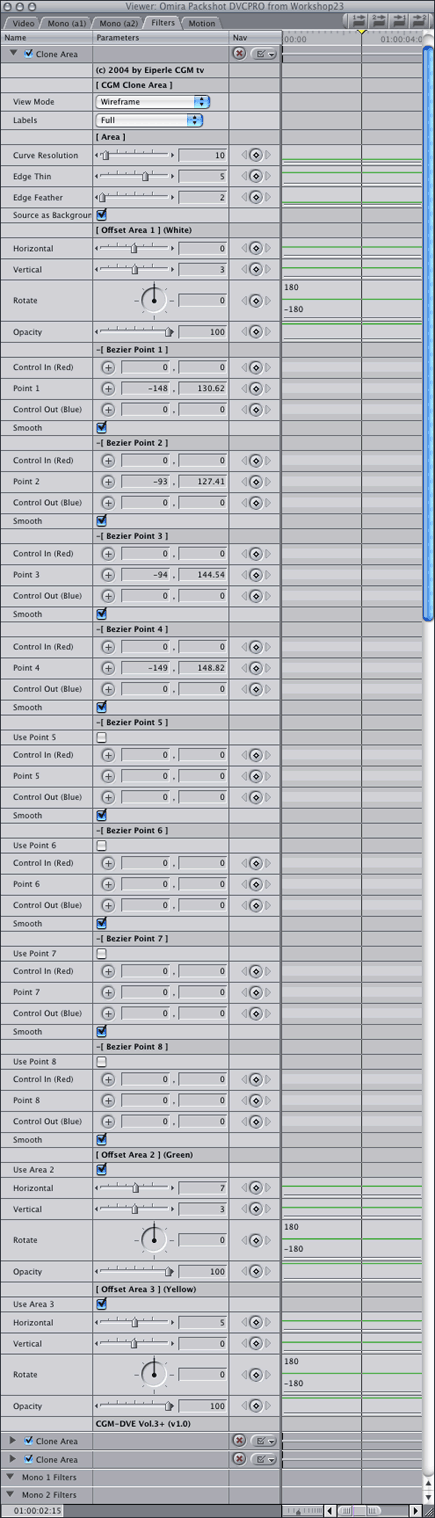
CGM DVE Vol.3+ (also included in CGM DVE Complete) contains a very flexible tool to clone areas of video, meaning you can brush out unwanted objects by using other parts of the picture. Of course you can do this by with Photoshop - but you lose the grain! The CGM Clone Area renders in 10bit high-precision YUV (if allowed in your Sequence Settings, tab Video Processing). The workshop shown here has nine video layers and is running in realtime (UnlimitedRT mode of FCP4 at a G5 2Gig DP, Quality: Medium, DV Video Output off). In this TV commercial the customer wanted us to remove a line of text on the product. |
|
|
|
|
|
In the Offset Area 1 section you can modify the position, alignment and opacity of the first copy (Horizontal, Vertical, Rotation and Opacity). In the example I've placed the first copy directly below the source area. |
|
|
|
 |
|
|
 |
|
|
 |
|
|
 |
|
|
 |
|
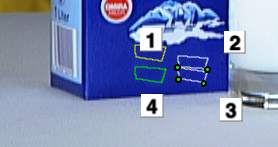
The view mode Preview shows only the labels and bezier controls. Because the outlines are not drawn, you'll be able to see the result of your work much better. Before you add further Clone Area filters you should always switch the view mode of the filter to Final so the controls will not distract you. The Curve Resolution defines the resolution of the Bezier curve. You won't normally need a higher value than the preset of 10. You can use up to 8 corner points: simply switch the additional points on by using their Use Point gadgets. Every point has two Bezier handles. If defined, the Bezier Control In is shown as red point and the Bezier Control Out is shown as blue point. If the option Smooth is enabled, the Out point is defined automatically and you'll get always a smooth shape. |
 |